At one of my former schools, every spring the elementary students (grades 1-6) chose a topic to research and prepared a short (5-10 min.) oral presentation about it. Topics ranged from “how cellphones work” to “frogs”, and anything in between. Sports, animals, technology, science, and other countries all seemed to be popular subjects. Projects were as varied as the kids’ personalities, and gave neat insight into their interests.
On a chosen evening, all the families gathered together at the school and each child gave their presentation to the audience. Responses were always extremely enthusiastic, and in many cases the parents were stunned at how well the children did at remembering their presentations and speaking clearly and intelligently about their chosen subject.
My son will be doing a project this spring, and when he is ready we will invite some friends and family over to see it. Yesterday I explained the concept to him and asked him what he’d like to study. He loves animals and nature, so I expected him to choose something along those lines. Instead he said, “Mom, what’s that way of communicating that came after tin can telephones but before cellphones?” (I had no idea!) He continued, “You know, they would tap a signal to each other that the other person had to figure out?” Ohh, you mean ‘Morse code’, right? “Yep, mom, that’s it!” So Morse code it is!
Here’s a quick look at putting together a presentation night: 
10. Choose it. This involves a little bit of brainstorming – they may want to flip through some books or encyclopedias to find some ideas. They’ll need to decide how specific to make their presentations: they could study “dogs”, for instance, or narrow it down to a specific breed of dog. Some kids may need more help than others, but I think it’s important to respect the child’s choice even if it’s not what you might think is the best topic.
9. Research it. For some kids, this may be the first real research that they do. It’s important that they get a variety of sources; if you’re doing this at a school, the parents will need to take the lead here and bring the child to the library to check out some books. The child should not copy references word for word, but should be restating the info in their own words.
8. Write it. Most kids seemed to like using a file-card sized (3 x 5) flip book. You can find these easily at any office supply store. Limit each card to only 2-3 sentences, and underline or highlight important words in each sentence.

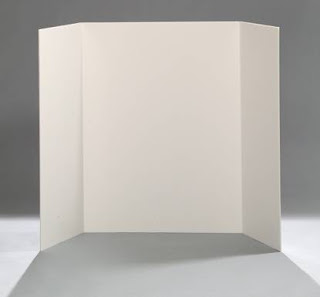
7. Illustrate it. Have the parents purchase 3-part demonstration boards (science-fair style, found at office supply stores) that can stand up on their own. Homemade versions made with posterboard do not work – they fall down too easily. Pictures that illustrate the topic can be drawn by the child and/or printed off the computer. If applicable, graphs, charts, or maps can also be included. The title of the presentation should be printed across the top of the board, and all drawings/charts/maps should be clearly labeled.
6. Demonstrate it. If at all possible, real objects (or live animals) should be included. If the topic can be demonstrated (re-creating a volcano or doing an Irish dance), that should be part of the presentation as well.
5. Practice it. The child should get a chance to practice for several weeks before the actual presentation night. That may include doing it at home, for siblings or parents; and at school, for small groups of students or other classrooms. They should do it enough that they only use their notes as a reference; it should be mostly memorized.
4. Advertise it. Let the community know about it – invite friends, family, and neighbors. They’ve worked hard, and they want to show off their knowledge! (I prefer to stipulate that young children not attend, but that’s up to you).
3. Class it up. Have the children dress in nice clothing – no jeans or shorts. Make a simple program with a list of each child and their chosen topic. Clean up the classrooms (or home) and even decorate if you like. Make it a special evening.
2. Record it. Videotape each child’s presentation, and take some snapshots as well. They’ll want to look back at it in years to come. When I was in a school, I made sure to get a picture of each child next to their presentation board and sent each family a picture of their own child. I also made up a poster for our classroom with a picture of each kid.
1. Enjoy it. This is the kids’ turn to shine. Allow each child as much time as they need to complete their entire presentation. Open it up to questions after each presentation – this really gives the kids a chance to show off all they’ve learned. Sometimes the kids who struggled most with the writing and research are the ones who turn into “naturals” in front of an audience. Let them surprise you, and their families, with the results of their hard work.
